How to Create Interactive Displays for your Portfolio Projects Using React and Deviceful


Have you ever wanted a more interactive way to display your portfolio projects?
This post is going to give a brief overview of how to do just that, using Deviceful.js and React.
Deviceful.js lets you spin up some really elegant and interactive displays with very few lines of code.
Some ways that Deviceful can help to make your displays interactive are...
The ability to automatically scroll through (or let a user scroll through) a screenshot of a project.
Animating the display by way of opening or closing the device, and entrance animations.
Let's get to it!
This post is a fairly brief overview of creating interactive displays and thus there isn't much prerequisite knowledge, and only assumes you have a basic working knowledge of React.
Let's start by creating a Create React App project
npx create-react-app deviceful-test
npm install deviceful
First things first
Copy the contents of nodemodules/deviceful/public into the public directory in the root of your project
ie: deviceful-react-boilerplate/public/deviceful/(put the contents here)
Next let's add our screenshot
Add a screenshot of your project to the public/deviceful directory. The docs say the best size for a screenshot is 1440X900 for a standard screenshot and 414X790 for mobile screenshots.
Also, if you want the ability to scroll through your display, we can add a screenshot with any height. As long as the width dimensions stay close to the recommended size.
Let's write some code
We're going to make things really short and sweet here and just replace the contents of your app.js file with the following code block.
Replace app.js with
// replace the contents of app.js with me please!
import React, { useEffect, useRef } from "react";
import Deviceful from "deviceful";
import "./App.css";
function App() {
const parent = useRef();
const device = new Deviceful({
screenshot: "yourScreenShotName.jpg",
screenshotHeight: 2402,
path: "./deviceful",
});
useEffect(() => {
device.mount(parent.current);
}, []);
return (
<>
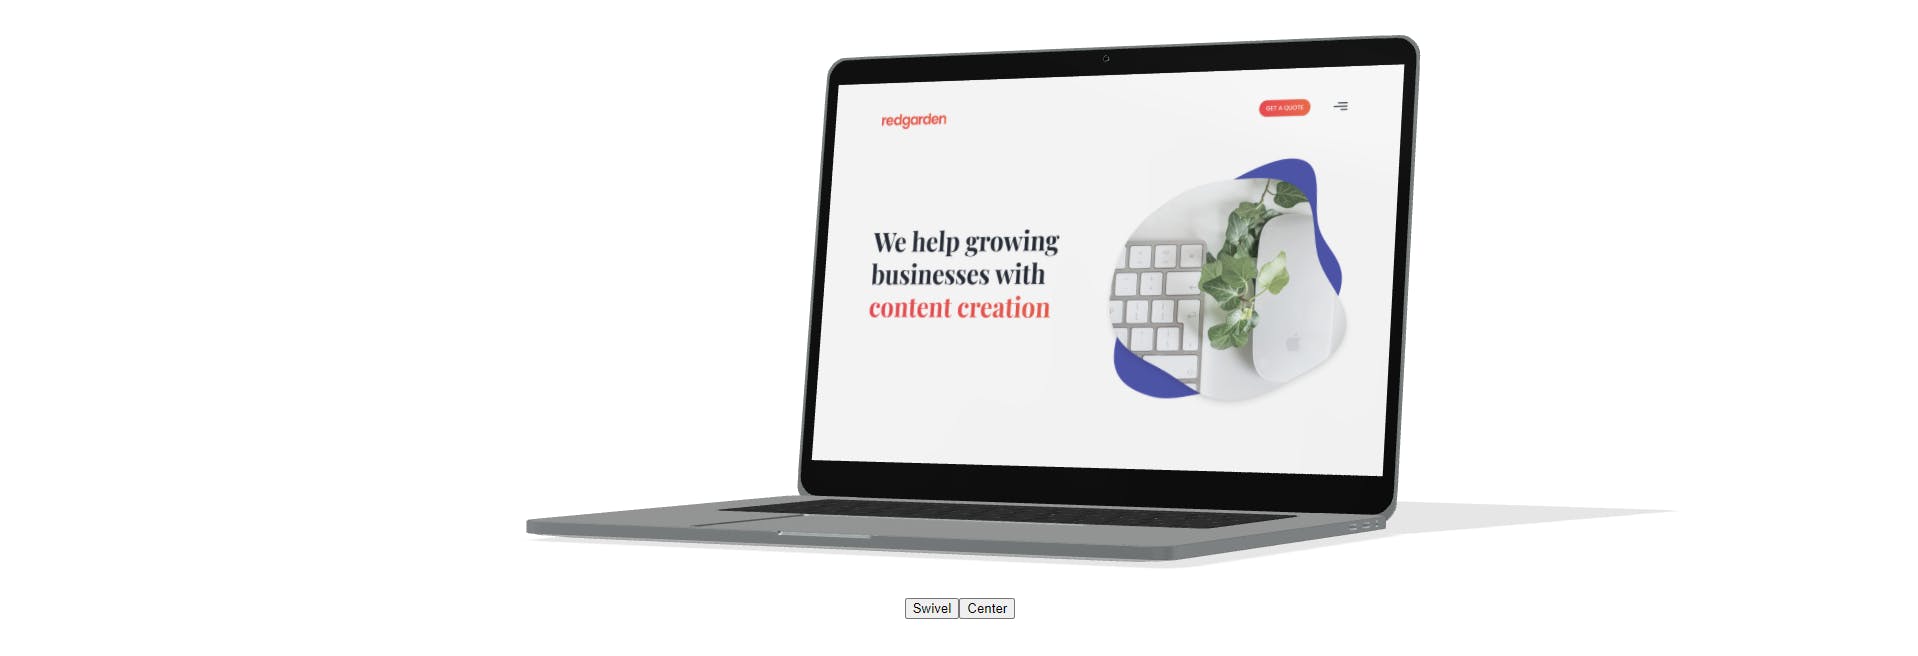
<div ref={parent} className="laptop"></div>
<div className="flex">
<button onClick={() => device.swivel()}>Swivel</button>
<button onClick={() => device.swivel({ to: 0 })}>Center</button>
</div>
</>
);
}
export default App;
Next, replace the contents of /app.css with
.laptop {
  height: 250px;
}

@media (min-width: 640px) {
  .laptop {
    height: 400px;
  }
}

@media (min-width: 1024px) {
  .laptop {
    height: 600px;
  }
}

.flex {
  display: flex;
  justify-content: center;
}
head to the terminal and start the dev server
npm start
now if we navigate to localhost:3000 in our browser we should see our screenshot displayed on a device that we can control right in the browser! Cool right?
Let's play with some settings
Deviceful comes with some really cool options out of the box
For example, we can display our screenshots on a phone or laptop.
const device = new Deviceful({
    screenshot: "yourScreenShotName.jpg",
    screenshotHeight: 2402,
    path: "./deviceful",
    device: 'phone'
  });
We can also make our device scroll through our screenshot when the device comes into view with the scrollOnLoad: and have the device rotated without the use of the buttons using initialDeviceRotation:, like this
const device = new Deviceful({
    screenshot: "yourScreenShotName.jpg",
    screenshotHeight: 2402,
    path: "./deviceful",
    device: 'phone',
    scrollOnLoad: {direction: 'down', duration: 8000},
    initialDeviceRotation: -25,
  });
The scrollOnLoad: property we added takes an animation object where we can define the scroll direction and the duration of the animation in ms
and the initialDeviceRotation: rotates the device along the y axis regardless of any animations you add.
Let's Make it Interactive
It's great we have our screenshot beautifully displayed on the device of our choosing, but how can we make it interactive? 🤔🤔
For the sake of brevity, we won't apply any serious styling here. I'll leave that mainly up to you. Let's jump in!
I'm going to add react-bootstrap-icons for some quick easy icons to help make this more interactive, lets npm install react-bootstrap-icons and when that finishes...
In our App.js file we need to add this line to import a couple of nice little arrows
import { ArrowUp, ArrowDown } from 'react-bootstrap-icons';
Then let's add these few lines under the buttons we have to swivel and center the device.
      <div style={{display: 'flex', flexDirection: 'column', alignItems: 'center'}}>
      <h2>
        SCROLL UP
      <ArrowUp onClick={() =>  device.scroll({direction: 'up', duration: 10000})}/>
      </h2>
      <h2>
        SCROLL DOWN
        <ArrowDown onClick={() =>  device.scroll({direction: 'down', duration: 10000})}/>
      </h2>
      </div>
There we go! Now the user can scroll our screenshots with these arrows!
Have fun
Be sure to check out the Deviceful Docs
There you'll find some more advanced features like animations and camera properties.
You can also find the code for this example here github.com/MiCurran/Deviceful-React-Boilerplate
Don't forget to leave a ⭐ if you use and enjoy the boilerplate!
I hope you enjoyed this brief introduction on how to create interactive displays of your projects. Leave an example of something you have made with the help of this tutorial in the comments!